

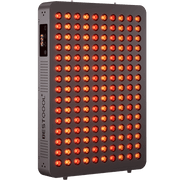
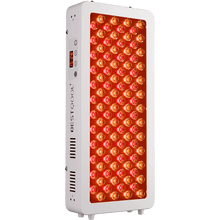
Red light therapy (RLT) has quickly become the go-to wellness solution to enhance your skin health, decrease inflammation, and speed up the recovery of muscles. Although commercial devices guarantee clinically proven effects, they tend to be costly. This has led many DIYers to look into creating their own red light treatments at home, in hopes of saving money and customizing the RLT devices. But just how feasible — and safe — is it?
In this guide, we tell you what’s involved in a DIY setup, the pros and cons, and how it actually differs from the professionally made device.

The Allure of a Homemade Red Light Therapy Panel
No wonder some people are interested in constructing their own red light therapy panel, as it can be a cheaper and more personalized wellness tool. Many who go DIY are attracted to the prospect of customizing a device to fit their needs — selecting the size, power, and colors of light most likely helps them reach their goals.
Online videos, DIY websites, and tutorials make it appear simple to construct a red light therapy panel yourself using basic parts. For the more tech-savvy folks, it’s also an opportunity to dive into the science behind light therapy. While the idea seems simple, being safe and therapeutic is about more than just putting things together. It’s too easy for things to go wrong without experience in electronics engineering, thermal management, and a proper understanding of light specifications.
Deconstructing the Device: What You Would Need
Creating a red light therapy panel at home is more than sticking a couple of red light bulbs into some electrical sockets. A "safe" and functional setup must emulate the important aspects of commercially available devices — particularly those related to therapeutic efficacy and safety. [1]
Here you will find the basic parts required to build your own DIY red light therapy panel:
Therapeutic-Grade LEDs (660nm and 850nm)
They are the heart of the system. You'll need:
- 660nm red light LEDs (visible light) for skin-level benefits (anti-aging, wound healing).
- 850nm Near-infrared (NIR) LEDs emit invisible light to penetrate deeper into muscles, joints, and inflammation.
Caution: Not all red LEDs adhere to these exact standards. Go with a reputable electronics reseller that provides wavelength data sheets or lab testing results.
Power Supply with constant current
LEDs are sensitive to changes in voltage, so you can’t use a typical plug-in adapter. You’ll need:
- A constant current driver to control the output and prevent LED burnout.
- The driver should match the same LEDs’ forward voltage and current rating. For instance, if your LEDs specify 700mA at 3V, and you’re wiring up 10 of them, then you must supply a combined load (e.g., ~7V at 7,000mA).
- Wiring, Soldering Tools, and Connectors
For safe and stable operation:
- You need good-quality wire to carry your current load.
- Aside from quick-connect tabs or pre-soldered LED modules, most LEDs will require soldering for reliable joints.
- You can also add a fuse/in-line switch to be able to turn your device on and off.
- Cooling: Heat Sinks and/or Fans
High-power LEDs can produce excessive heat, which can shorten the LED’s lifespan if a proper heat sink is not present to dissipate this heat. You’ll need:
- An aluminum heat sink is behind each LED or LED module.
- Cooling fans for air flow if you're enclosing the panel.
- Housing or Mounting Frame
A frame would be required to bring it all together safely. Options include:
- Metal or Wood frame to secure LED strips or boards.
- Reflective backing (such as aluminum sheet or foil) for enhanced light reflection.
The housing should also be vented for cooling and provide wire channels to ensure safe cable management.
Why Not Just Any Red LED Will Work
Many DIYers assume that any red LED light would confer advantages on the therapeutic side of things. Red Light Therapy actually employs particular wavelengths, mainly 660nm (visible red) and 850nm (invisible near-infrared), to penetrate the skin and tissues properly. [2]
Unfortunately, most generic red LEDs do not have these exact wavelengths. Without a spectrometer — a device that measures light wavelength- it would be nearly impossible to verify if the LEDs you choose fall in the therapeutic range. The wrong LEDs might mean wasted time, effort, and money, with no health benefits.
Commercial devices are made under strict control and usually lab tested to give accurate wavelength output, which, in all fairness, is difficult for a DIYer to replicate.
Navigating the Serious Risks of DIY Electricals
If you are not an electrician or electronics hobbyist, constructing a red light panel can pose a safety risk. High-power LED suitable for voltage and current regulation. Mismatched components can cause:
- Overheating
- Short circuits
- Electric shock
- Fire hazards
When it comes to commercial devices, they need to pass safety testing, be certified as UL, CE, or FDA (in certain instances), etc. With DIY installations, there’s no such protection.
You will have to do wiring, select an adequate power supply, and maybe even solder parts. If you don’t insulate and house your own panel correctly, it might be unsafe to operate.
The Hidden Factors of Heat and EMFs
Two significant aspects often overlooked, which DIYers fail to take into account, are heat output and electromagnetic fields (EMFs).
Heat: High-powered LEDs generate significant heat. Without adequate decorative heatsinks or active cooling (fans), your panel might overheat, shut down, or burn a person touching it. Steady-state overheating also reduces the life of parts.
EMFs: Red Light Therapy devices emit EMFs (electromagnetic frequencies) dependent on their circuitry. Poorly shielded DIY kits might generate more EMF, especially if you use them up close on a regular basis. And professionally designed panels usually have EMF-suppressing features; DIY systems do not.
Irradiance: The Difference Between Glowing and Healing
An RLT device cannot be judged by the brightness. What does matter is the irradiance (the power of light applied per area) in mW/cm².
Therapeutic irradiance is typically considered to be 20–100 mW/cm² at a usable distance (approximately 6 and 12 inches). If your DIY panel doesn’t hit those levels, it may not do much. But if it passes them without constraints, it could harm.
Irradiance testing typically requires the types of expensive gear, like a light meter or spectroradiometer, that most hobbyists don’t have. This also makes it hard to verify if your homemade system is actually working.

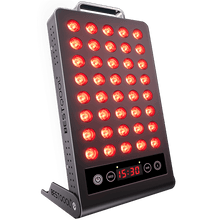
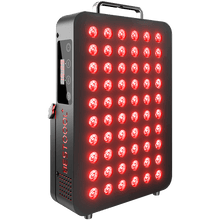
DIY Red Light Therapy vs Buying A Professional Device
Let’s take a look at the primary differences to assist you in making an informed decision:
| Feature | DIY Setup | Professional Device |
| Cost | $100–$300 (varies) | $300–$1,000+ |
| Wavelength Accuracy | Difficult to measure without tools | Guaranteed (660nm / 850nm) |
| Irradiance | Unknown or variable | Lab-tested and reported |
| EMF output | Unshielded; can be high | Low/EMF-safe |
| Heat Management | Requires design effort | Built-in heatsinks/fans |
| Safety Certifications | None | UL, CE, FDA (varies) |
| Durability | Varies; no warranty | Warranties often included |
| Technical Skill Needed | High | None |
| Time Investment | Several hours to days | Plug-and-play |
Making a Safe and Effective Choice for Your Wellness
With a little bit of technical know-how, the right tools, and some patience, building your own red light therapy panel is something many wouldn’t hesitate to do. But it’s also a project that entails genuine risks and plenty of learning.
For the majority of us, it will be worth spending more up front for a professional model that is convenient, safe, and proven to work. These units have undergone research, receive warranties, and customer support so you can be sure of their quality performance.
If you are still leaning toward a DIY build:
Just be careful when using untested 660nm and 850nm LEDs
Measure irradiance if possible
Add cooling (fans or heat sinks)
Use properly rated power supplies
Ensure proper insulation and housing
However, if all you care about is getting results, investing in a professionally made device may be the safer and more effective option.
References
- Pagán, C. N. (2024, May 14). Red Light therapy: What is it? WebMD.
- Jagdeo, Jared et al. “Safety of light-emitting diode-red light on human skin: Two randomized controlled trials.” Journal of biophotonics vol. 13,3 (2020): e201960014.


 Small
Small
 Moderate
 Moderate
 Moderate
 Full
Full


