As stress mounts with fast-paced lifestyles, the problem of hair loss is spreading to both men and women of all ages. Hair loss and thinning of hair are depressing issues. It can take a big toll on an individual's self-esteem and confidence. Many conventional treatments are available nowadays to potentiate hair growth but they often possess drawbacks such as limited effectiveness and long-term maintenance. Medication, topical treatments, and surgical interventions involve painful procedures, longer recovery times, and the risk of adverse effects in many cases.
Is it possible to promote hair growth without medicine, injections, or surgery? Today, I will introduce the mechanism and application of red light therapy, a non-invasive and painless treatment for hair regrowth.

How Does Red Light Therapy Work for Hair Growth?
Red light therapy (also called low-level light therapy) uses gentle red and near-infrared light to “wake up” hair follicles. Think of it as a nudge for tired cells. The light reaches the roots of the hair and encourages them to stay in the growth phase longer.
Scientists first noticed this effect in the late 1960s, when Dr. Endre Mester observed that low-energy red light helped hair regrow on shaved lab animals. Since then, research has explored how and why this happens.
Here’s the simple version: light in the 630–850 nm range is soaked up by tiny power centers inside our cells (the mitochondria). With more cellular energy available, follicles can work more efficiently on repair and growth. This light may also improve blood flow in the scalp, bringing more oxygen and nutrients to the follicles—two things hair needs to grow thicker and healthier.
Why Choose Red Light Therapy?
Choosing a hair growth treatment can be confusing. If you want something gentle that fits into everyday life, red light therapy is worth a look. Here’s what sets it apart—and how it actually feels to use.
No drugs or surgery
No prescriptions, injections, or incisions. You simply wear a light cap/helmet or use a handheld device—no anesthesia, no clinic recovery time.
Low risk for most people
When used as directed, most users report little to no issues. Some may notice mild warmth or brief redness on the scalp. If you’re pregnant, photosensitive, or take light-sensitizing medications, check with a healthcare professional first.
Painless sessions
Sessions feel like gentle warmth—no stinging or burning. You can read, watch TV, or answer emails during a 20–40 minute session and go right back to your day.
Simple at home
Caps, helmets, and handhelds are easy to operate. There’s nothing messy to apply and no cleanup afterward. Most routines are just a few times per week.
Easy to fit in
Use it while cooking, studying, or relaxing. Start with a clean scalp, put the device on, set a timer, and you’re done. It can usually be paired with your regular hair-care routine; if you use prescription products, ask a clinician how to combine them.
If you’re after a low-effort, low-risk option, red light therapy offers a practical way to support thicker-looking hair over time. Stay consistent, and check with a professional if you have medical conditions or take photosensitizing meds to make sure it’s the right fit.
Does Red Light Therapy (LLLT) Work for Hair Growth? Evidence and Real-World Results
Research in peer-reviewed journals suggests that red light therapy—also called low-level light therapy (LLLT)—can help with common hair thinning. Studies on men and women with androgenetic alopecia have reported increases in hair count, hair density, and hair shaft thickness after consistent use over several months. Results vary by person, but the trend across multiple trials points to measurable improvements when treatments are used regularly.
Real-world experiences line up with the research. Many users report fuller-looking hair and better coverage after sticking to a routine. For example, one long-term hair-loss sufferer used a red-light cap most days of the week and noticed thicker, denser growth and a healthier-looking scalp after several months. Not everyone will see the same changes, but steady use and patience are key—and it’s wise to check with a clinician if you have medical questions or are using other hair treatments.

Is Red Light Therapy Easy to Use at Home?
Yes—most people find at-home red light therapy simple to set up and stick with. Here’s a clear, step-by-step way to make it part of your routine.
Pick a device
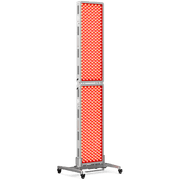
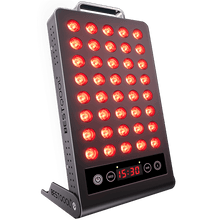
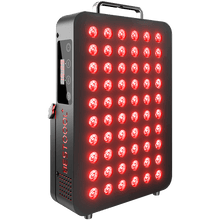
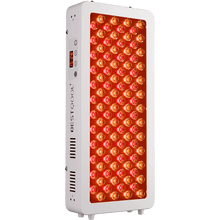
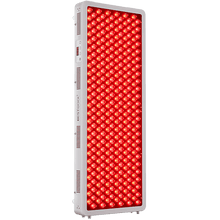
Choose what fits your lifestyle: a cap/helmet (hands-free, even coverage), a handheld comb (good for part lines), or a small panel (targeted use). Look for wavelengths in the 630–850 nm range, a built-in timer, and auto shut-off.
Prep your scalp
Start with clean, dry hair. Part thicker hair so light reaches the scalp. Skip heavy oils or styling products before sessions—they can block light. If you use medicated topicals, apply them after your session unless your clinician advises otherwise.
Set your schedule
Consistency matters more than intensity. A common routine is 20–40 minutes, 3–4 times per week. If you’re sensitive, begin with 10–15 minutes and build up over 1–2 weeks.
Position it right
Wear caps snugly as directed. Hold handhelds 1–2 inches from the scalp and move slowly if it’s a comb. Try not to stare directly into the LEDs; use the included eye shield or close your eyes if needed.
What it feels like
Most users feel gentle warmth—no stinging or burning. Read, watch TV, or answer emails while it runs. There’s no downtime afterward.
After your session
Resume your day as normal. A 1–2 minute scalp massage can help blood flow. If using topicals, let them fully dry before covering your head.
Track your progress
Take photos every 4–6 weeks in the same lighting and angle. Hair cycles are slow; many people notice changes in coverage or thickness after 3–6 months of steady use.
Keep it clean
Wipe the device with a soft, slightly damp cloth. Avoid harsh cleaners and moisture inside the unit. Store it in a cool, dry place and recharge batteries as needed.
Basic safety
Follow the manual. If you’re pregnant, photosensitive, or take light-sensitizing medications (e.g., some antibiotics or acne treatments), ask a healthcare professional first. Avoid use on open wounds or infected skin. Stop and check in with a clinician if you notice persistent redness or headaches.
At-home red light therapy for hair is plug-and-play for most people—clean scalp, set timer, relax, repeat. Stay consistent and give it time to work with your hair’s natural growth cycle.
How to Use Red Light Therapy at Home for Hair Growth
Getting more growth is about steady, repeatable habits. Here’s a simple, hair-focused routine you can follow at home.
Pick a device that suits you
Caps/helmets give even coverage (great for crown and hairline). Handheld combs or small panels help you target part lines and temples. A built-in timer and auto shut-off make consistency easier.
Start with a clean, reachable scalp
Wash or at least make sure the scalp is clean and dry. Part thicker hair so light actually hits the skin—not just the strands. Skip heavy oils or styling products beforehand.
Aim at thinning zones
Place the light over the crown, hairline, and temples—where miniaturized hairs need the most help. If using a handheld, move slowly along each parted line so every area gets time under the light.
Follow a steady schedule
A common plan is 20–40 minutes, 3–4 times per week. Example: Mon/Wed/Fri or Tue/Thu/Sat. More time isn’t always better—stick to the device’s instructions.
Run the session comfortably
Fit caps snugly; hold handhelds about an inch or two from the scalp. Expect gentle warmth, not heat. Avoid staring into the LEDs; close your eyes or use the included shield if provided.
After the session
No downtime needed. A brief scalp massage (1–2 minutes) can support blood flow. If you use topicals (like minoxidil), apply them after the light unless your clinician advises otherwise.
Track real signs of progress
Take photos in the same spot and lighting every 4–6 weeks. Early signs can be less shedding and baby “vellus” hairs at the hairline; fuller coverage often shows over 3–6 months with consistent use.
Keep it safe and consistent
Read the manual. If you’re pregnant, photosensitive, or take light-sensitizing meds, check with a healthcare professional first. Pause use and seek guidance if you notice persistent irritation.
Bottom line: Make the scalp easy to reach, target thinning areas, and keep a simple 3–4-days-a-week routine. Hair grows in cycles, so patience and consistency are what turn red light sessions into visible results.
Will Red Light Therapy Save You Money? (1-, 2-, and 3-Year Math)
For many people, yes. An at-home red light therapy device is a one-time purchase plus a few dollars a year in electricity. By contrast, clinic sessions add up quickly.
Simple idea:
Savings = (clinic price × ~65 sessions/year × years) − (device + small power cost).
Using a common clinic price of $75 per visit, the math looks like this:
- After 1 year: save about $4,670
- After 2 years: save about $9,540
- After 3 years: save about $14,420
Even if your clinic charges less, the device usually pays for itself in just a handful of visits. If you’re comparing against monthly hair products instead, the device often breaks even within the first year and then pulls ahead—especially if you stick to a steady routine.
An at-home red light therapy device keeps your ongoing costs tiny, so consistent use over 1–3 years typically translates into meaningful savings.
Red Light Therapy for Hair Growth
Red light therapy offers a gentle, non-invasive way to support hair regrowth when used consistently over months. It fits easily into a home routine or clinic plan and can pair with other hair-care approaches. Results vary, so talk with a healthcare professional if you’re pregnant, photosensitive, or using light-sensitizing meds. If you want a low-effort option to back healthier-looking hair, this is a practical place to start.


 Small
Small
 Moderate
 Moderate

 Moderate
 Full
Full


