
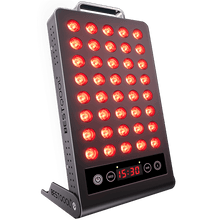
For comfort-oriented home use, expose the bare lower back and center the panel over the painful lumbar region---often described as the L4--L5 area---with the light directed toward the skin. Choose a stable position that keeps the area evenly exposed, then follow your panel's user manual and safety instructions for distance, session length, coverage, heat precautions, and eye-safety instructions.
This is positioning guidance for lower-back discomfort, not a way to diagnose or treat a disc problem, nerve compression, or another spinal condition.
Use a Home Panel as Support, Not a Standalone Back Treatment
Research does not establish photobiomodulation as a proven way to reduce pain or disability in acute, subacute, or chronic non-specific low-back pain. A systematic-review summary from the Australian Physiotherapy Association found that current evidence does not support it as an effective treatment for those outcomes.
That does not make careful home use unreasonable for uncomplicated discomfort, but it does set an important boundary: do not substitute a panel for clinical assessment, prescribed care, exercise-based rehabilitation, or advice from a qualified clinician.
Before setting up, ask a simple question: Am I using this as a comfort-oriented addition to appropriate care, or am I trying to self-treat symptoms that need assessment? If the answer is unclear, get medical advice first.
Identify and Expose the Target Area

The lower back is a broad area, so avoid treating the panel's placement like a precise map of a specific spinal structure. A source-described home protocol uses the L4--L5 region as a lower-back landmark, but it does not establish that you must treat the spinal midline, the muscles beside it, the hips, or all of those areas.
Use the painful lumbar area as your practical reference point.
- Expose the area. Position clothing out of the way so the panel can illuminate bare skin rather than relying on light passing through fabric.
- Find the center of discomfort. If discomfort is centered low in the back, begin by centering the panel over that lumbar region.
- Check side-to-side coverage. Look or use a mirror to confirm that the illuminated area reaches the painful region evenly, rather than landing mostly on one side of the back.
- Adjust for a one-sided symptom area. If discomfort is clearly more noticeable on one side, shift your body or panel slightly so that side is included in the panel's treatment field---without assuming you need to target a particular deep tissue or nerve.
- Keep the panel aimed directly at the skin. The useful output is what reaches the skin at your actual setup, not a specification measured at the panel face.
There is no established lower-back rule requiring a perfectly square, 90-degree panel angle. The practical goal is simply to avoid an awkward sideways setup that leaves part of the intended lumbar area outside the light field.
Coverage Check: Before starting, make sure the painful lower-back area is bare, directly facing the panel, and comfortably within the illuminated area. If you have to twist, hunch, or hold an unstable position to achieve this, change the setup.
Choose a Position You Can Hold Comfortably

There is no evidence-based requirement to lie face down, lie on your side, sit, or stand for a lower-back panel session. Select the arrangement that gives you direct lumbar exposure while allowing both you and the panel to remain stable.
| Position | When It May Be Practical | Setup Priority |
|---|---|---|
| Face down | When the panel can be securely positioned above or behind you without requiring you to reach or twist | Keep your neck, hips, and low back comfortable; do not place the panel in an unstable overhead position. |
| Side-lying | When lying face down is uncomfortable or when you need to shift the panel toward one side of the low back | Rotate only enough to expose the target area; avoid holding a strained twist. |
| Seated | When a panel stand or wall-mounted setup can face your lower back directly | Sit with your back supported and avoid leaning or turning to "find" the light. |
| Standing | When the panel is fixed securely at an appropriate height | Stand close enough to maintain the manual's stated distance without bracing, bending, or moving around. |
A repeatable arrangement is usually more useful than an elaborate one. Secure the panel, keep cords clear of the area where you walk or reposition, and make sure you can stop the session without difficulty.
Set Distance From the Manual, Not the Wattage Label
Do not choose treatment distance based on a panel's electrical wattage. What matters for setup is how panel distance affects light exposure, along with its instructions for use.
Moving farther from a panel generally reduces the irradiance that reaches the skin. Beam angle and scatter can also change what is delivered across the lower back. That is why a distance that works for one panel should not be copied to another.
One source-described protocol places a device 1--6 inches from bare skin over the L4--L5 area. Treat that only as an example, not as a universal home-panel instruction. Your manual overrides it.
Run a Conservative Session and Watch Your Response
Once the panel and your body are positioned, use the manufacturer-verified time and distance setting. Do not assume that longer sessions, closer placement, or higher intensity will produce a better result. Photobiomodulation is described as having a biphasic dose response, meaning more exposure is not automatically better.
A source-described lower-back schedule is 10--20 minutes, 3--5 times weekly. It is not a prescription and may not apply to your panel's output, your symptoms, or your health circumstances.
For a cautious first routine:
- Use the panel's stated lower-back distance and session duration.
- Stay in the same stable position rather than repeatedly moving closer to the lights.
- Do not stare directly into the panel; follow the manufacturer's eye-safety instructions.
- Pay attention to how the panel feels during use, including heat and skin comfort.
- Do not increase time or intensity simply because the result is unclear.
Temporary mild redness can occur. Stop the session and reassess the setup if the panel feels too hot, positioning becomes uncomfortable, or skin becomes irritated. The available guidance does not provide a universal heat threshold or a specific home protocol for persistent reactions, so do not try to "push through" discomfort.
Know When to Get Advice Before Using a Panel
Seek individualized medical guidance before lower-back photobiomodulation use if you are pregnant; have photosensitivity; use photosensitizing medication; have active cancer in the treatment area; have implanted devices; or have an existing eye condition. These are precautionary situations, not a complete list of every circumstance that may require individualized advice.
Home panel use is also not an appropriate substitute for evaluation when back pain is worsening, follows trauma, or radiates with numbness or weakness.
Lower-Back Setup Checklist and Safety Decision Point
Before each session, confirm:
- [ ] I am using the distance, duration, and other settings verified in my panel's manual.
- [ ] My bare, painful lumbar area is evenly exposed.
- [ ] The panel is directed toward the target area rather than angled away from it.
- [ ] My body position is stable, comfortable, and free of twisting.
- [ ] The panel and its cable are secure.
- [ ] I will not look directly into the lights.
- [ ] I will pause and reassess rather than escalating exposure if the setup is uncomfortable or results are unclear.
Proceed cautiously when symptoms are uncomplicated, your setup is comfortable, and your device instructions support the session.
Get clinician guidance before use if you have relevant health circumstances such as pregnancy, photosensitivity, photosensitizing medication use, implanted devices, active cancer at the treatment site, or eye conditions.
Seek prompt or urgent medical care instead of relying on home treatment for back pain that worsens, radiates with numbness or weakness, or follows trauma.


 Small
Small

 Moderate

 Moderate

 Moderate

 Full
Full

