For users who want to expand their treatment area, our panels can be securely connected using the splicing function. This setup creates a larger, seamless unit that delivers wider light coverage.
Splicing Function: Step-by-Step Guide
- Align the bottom of the upper panel with the top of the lower panel.
- Position the splicing sheet so that it matches the holes on one side of both panels.
- Insert and tighten the two thumb screws into the holes on the splicing sheet.
- Repeat the process on the opposite side of the panels.
Important Notes
- For safety, two people should complete the splicing process.
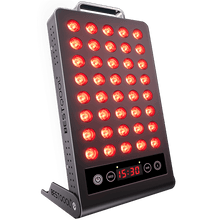
- Compatible only with the following models: BQ150, Pro100, Pro200, Pro300.
- Requires at least two compatible panels.
- The stand shown in images is sold separately.
Why Use the Splicing Function
By attaching two panels together, you can create a more powerful setup with greater coverage. This function is ideal for users who want a professional-level experience at home or need a larger treatment area in a single session.


 Small
Small

 Moderate

 Moderate

 Moderate

 Full
Full

