
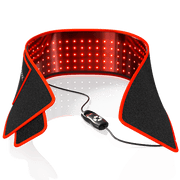
Use bare, clean lumbar skin where practical, with a clear path between the device and your lower back. Place the device behind an open-back chair or slightly behind and to one side, securely supported, and aim it toward the sore lumbar-muscle area as close to perpendicular as your workstation allows. Then use your device manual's stated irradiance at that exact skin distance to set session time.
Do not try to make up for a shirt, chair back, uncertain output, or an awkward angle by adding extra time. There is no universal lower-back distance, dose, session length, or weekly schedule that fits every device.
Q: Where Should the Device Go While I am Seated?

The practical goal is to expose the broad muscular area of the lower back without placing a chair, clothing, or unstable device between the light source and your skin.
A seated setup usually works best in one of two arrangements:
- Behind the back: Use an open-back chair, move forward enough that the chair does not sit between the device and your lumbar area, and place the device behind you at its manual-specified treatment distance.
- Rear-side placement: Put the device slightly behind and to one side of your chair, then turn or angle your torso only enough to give the light a clear route to the target area.
Center the treatment area over the lower-back muscles or the general region of discomfort rather than trying to identify or "target" a particular spinal structure. Light positioning cannot diagnose the cause of back pain or confirm that a specific deep structure is being treated.
A Simple Seated Setup Sequence
- Expose the lower-back skin if feasible.
- Remove or move anything between the device and skin, including a chair back, lumbar roll, thick waistband, belt, or jacket.
- Secure the device on a stable stand, mount, or surface; do not balance it loosely behind your chair.
- Set the device at the distance specified in its instructions.
- Aim the beam as directly toward the skin as the workspace permits.
- Sit still for the timed session rather than repeatedly shifting out of the treatment area.
Avoid pressing your back against the device, trapping heat between the device and chair, or using a setup that could tip if you move.
Should I Use It Through a Shirt?
Treat clothing as an obstruction, not as a predictable filter. Available consumer-source claims suggest that ordinary clothing can materially reduce the light reaching the skin, with darker and denser fabrics generally reducing transmission more than lighter, looser materials. But fabric type, color, weave, thickness, and wavelength all matter, so there is no reliable generic percentage to use when extending session time.
The practical answer is simple: expose the skin when possible. If that is not practical, do not assume a longer session restores the intended dose.
Q: Should I Use Red Light, Near-Infrared Light, or Both?
Use the wavelength mode your device instructions specify for its intended use, and do not assume that one wavelength or a combined mode is automatically best for every lower-back concern.
Photobiomodulation trials reviewed across chronic-pain conditions used wavelengths from 660 to 905 nm, spanning visible red and near-infrared light. That range describes research parameters across multiple conditions; it does not establish an ideal seated lower-back setting.
For a desk setup, the more actionable variables are often:
- whether the intended lumbar area is fully within the device's treatment field;
- the manufacturer's specified distance;
- the irradiance measured or stated at that distance;
- the angle of the device relative to the skin; and
- whether clothing or chair components block the beam.
Why Distance and Angle Matter
Irradiance is the light power delivered over a given skin area, usually expressed in milliwatts per square centimeter. A published irradiance figure is meaningful only under its stated measurement conditions.
Moving farther away can change both coverage and irradiance. Tilting the device sharply can spread its output over a larger apparent area rather than directing it squarely at the skin. For that reason, use the distance at which your device's irradiance was specified, and keep the beam as close to perpendicular to the lower back as your seating arrangement allows.
Check the manual or official specifications for the device's wavelength mode, treatment distance, irradiance measurement conditions, treatment area, timer limit, eye guidance, and contraindications.
Q: How Do I Calculate Dose and Session Time?
Start with two device-specific values:
- Irradiance: the stated output at your actual skin distance, in milliwatts per square centimeter.
- Target fluence: the intended energy delivered to each square centimeter of skin, in joules per square centimeter.
To calculate time in plain terms, convert milliwatts to watts by dividing by 1,000. Then divide the selected fluence by irradiance in watts per square centimeter. The result is the exposure time in seconds.
For example, this is only a hypothetical calculation:
- Verified irradiance at the chosen distance: 20 mW/cm²
- Converted irradiance: 0.020 W/cm²
- Selected fluence: 6 J/cm²
- Required exposure: 300 seconds, or 5 minutes
This example is not a recommended lower-back dose. It only shows how to translate a verified irradiance figure into time.
Also distinguish fluence from total energy. Fluence is energy per unit of skin area, expressed as J/cm². Total energy in joules does not tell you the skin dose unless the treated area is also known.
Reported PBM trial doses have ranged from 4 to more than 130 J/cm², while wavelengths, devices, frequencies, and protocols varied substantially. That variation prevents the research from establishing one standardized lumbar dose or session time. A systematic review of photobiomodulation protocols in chronic-pain trials underscores why copying a time from another device or study is unreliable.
What If My Device Does Not State Irradiance at Distance?
Do not invent a time from wattage, LED count, marketing claims, or another model's specifications. Ask for documentation that identifies irradiance at a stated distance and, ideally, how it was measured.
If you cannot verify irradiance at your actual treatment distance, follow the device manual's time limit conservatively rather than attempting a dose calculation.
Q: How Often Can I Use It?
Follow the schedule and maximum-use limits in your device instructions. If those instructions permit repeated use, begin conservatively and assess your response before changing duration or frequency.
Research schedules have ranged from one to seven sessions per week, with programs lasting from a few days to 12 weeks. Those ranges do not define an optimal schedule for seated lower-back use because the underlying devices, wavelengths, doses, and conditions differed.
Use a simple decision process:
- Start: Choose a conservative session duration within the manual's limits.
- Monitor: Note local heat, skin response, discomfort, and whether symptoms feel worse rather than better afterward.
- Reassess: Do not automatically add time, move closer, or increase weekly sessions because results are not immediate.
Do not borrow short "per point" exposures from athletic-performance protocols and apply them to a broad panel over the lower back. Those studies used different purposes and treatment arrangements.
Q: When Should I Reduce, Pause, or Stop?
Pause the session if you experience uncomfortable heat, skin irritation, unusual discomfort, or temporary tingling that concerns you. Check the device's instructions before resuming, especially if they include specific limits for heat, skin sensitivity, medications, eye protection, or medical conditions.
Most trials in one chronic-pain review reported no adverse events, but transient local warmth, mild discomfort, and temporary tingling were reported in one trial. That does not replace the safety instructions for your specific device or make every seated setup appropriate.
Do not use escalating light exposure as a response to persistent or worsening back symptoms. Photobiomodulation may be used as a comfort-focused adjunct, but lower-back-specific effectiveness and a standardized protocol are not established by the reviewed evidence. It does not identify or resolve structural, neurologic, infectious, or systemic causes of back symptoms.
Seek clinical assessment rather than self-treating if symptoms are persistent, worsening, or accompanied by concerning neurologic or systemic signs.
Seated Lower-Back Setup Checklist

Before starting a desk session:
- [ ] Clear an unobstructed path to the lumbar skin.
- [ ] Keep shirts, waistbands, chair backs, and lumbar supports out of the beam path.
- [ ] Stabilize the device so it cannot fall or shift.
- [ ] Use the manual's stated treatment distance and timer limit.
- [ ] Aim the device as directly toward the lower back as possible.
- [ ] Match session time to verified irradiance at that distance when a calculation is possible.
- [ ] Begin conservatively rather than compensating for obstructions with extra time.
- [ ] Monitor heat and skin response, then reassess rather than escalating dose automatically.
Persistent, worsening, or concerning back symptoms need clinical assessment rather than more self-treatment.


