

A red light therapy mat and a panel should not be measured the same way: a mat is usually a contact or near-contact device, while a panel is a non-contact device whose output changes with distance, angle, and coverage.
You set up a mat for lower-back recovery or a panel for your face, then realize the hard part is not turning it on but deciding what “the right distance” actually means. The practical benchmark is simple: keep the skin position repeatable, because posted output can change quickly once body curves, panel angle, and fabric layers get involved. You’ll leave with a straightforward method to measure distance, estimate dose, and plan more consistent home sessions.
The Variable That Matters First

Distance is only a proxy for skin-level irradiance
Photobiomodulation studies track wavelength, irradiance, exposure time, and energy density as separate variables, which is why “I used the device from 8 inches away” is not a complete treatment note. Distance matters because it changes how much light reaches the skin, but the technical variable you are really managing is irradiance at the treatment surface, usually expressed as mW/cm².
Regulatory device guidance for photobiomodulation devices treats wavelength, power, beam area, irradiance, and exposure conditions as core reporting variables. In plain language, that means a useful home setup should answer two questions every time: how much light is reaching the skin, and for how long?
The quick calculation that turns distance into dose
A practical way to think about session planning is:
Dose (J/cm²) = Irradiance (W/cm²) x Time (seconds)
If a panel delivers 0.08 W/cm² at the tested spot and you use it for 600 seconds (10 minutes), the calculated dose at that spot is 48 J/cm². If your real skin position only receives 0.04 W/cm² because you leaned back, rotated your shoulder, or moved farther from the center beam, the same 10 minutes gives 24 J/cm².
That is the main reason distance measurement matters so much more with panels than people expect. Dose-response reviews in photobiomodulation show that treatment outcome depends on the actual delivered dose, not just device ownership or session length.
Why Mats and Panels Need Different Distance Rules
A mat is usually measured from the body outward
With a red light therapy mat, the working assumption is usually contact or near-contact use. If the emitting surface is touching your back, hamstring, or calves, your treatment distance is effectively 0 inches at the flat contact points. If you place a towel, fitted cover, or clothing layer between the mat and the skin, that layer becomes part of the distance and may also reduce the light that actually reaches the surface.
The important detail is body contour. A mat may be 0 inches away at the mid-back but farther away at the waist curve, shoulder blade edge, or outer hip. That makes mats feel simpler than panels, but they are not perfectly uniform in real use. Model-based dose estimates in light therapy show that delivered light changes with geometry, path length, and tissue interface conditions.
A panel is measured from the panel outward
A panel is different because it is a non-contact source. You measure from the front plane of the LEDs or lens surface to the skin surface you want to treat. As that distance increases, the beam spreads, the treated area gets larger, and the intensity at a single point usually drops.
That drop is not something you should treat as a perfect textbook inverse-square problem. Multi-LED arrays operate in the near field, and optics, beam angle, diode spacing, and hotspot distribution all affect the actual reading. Reviews of photobiomodulation parameters emphasize that irradiance and treatment geometry are tightly linked variables, so two panels set at the same 8-inch distance can still deliver very different skin-level exposure.
How to Measure Each Device at Home

Measuring a mat correctly
For a mat, measure the real stack between emitter and skin. If you lie directly on the mat with bare skin, record the setup as direct contact. If you use a thin shirt, towel cover, or fitted sheet, note that layer every time because your repeatability now depends on using the same barrier, the same body position, and the same side of the body.
A simple logging note works well for home routines: Lower back mat session: direct contact, lying flat, 20 minutes or Hamstring mat session: one towel layer, side-lying, 15 minutes
This sounds basic, but it is what keeps your skincare or recovery routine from drifting week to week. A mat does not need a long tape-measure process; it needs consistent contact conditions.
Measuring a panel correctly
For a panel, use a tape measure and measure straight from the front face of the panel to the skin target, not to your chair, mirror, or body centerline. If you are treating your face, measure to the cheek or forehead plane you actually want illuminated. If you are treating quads, shoulders, or full torso exposure, measure to the closest skin surface that sits inside the main beam.
The second step is just as important: hold the same posture each session. A face turned slightly away from the panel or a knee bent under the beam can change effective exposure even if the tape measure says the same number. For that reason, panel sessions should be documented more like a photo setup than a heating pad setup.
What to record for repeatability
Home distance guidance is most useful when it ties measured distance to a specific tested setup, not when it gives a generic “stand close” rule. For a panel, record the exact distance in inches, whether the area was centered in the beam, and whether the body part was flat or angled. For a mat, record direct contact versus layered contact, plus body position.
If you own a light meter that is suitable for your wavelengths, use it as a spot-check tool rather than assuming the product-page number is what your skin receives. If you do not own a meter, the next best option is disciplined setup logging.
How Distance Changes Real Session Planning
The same session time can produce a very different dose
Controlled photobiomodulation protocols treat dose, site, and exposure time as deliberate variables, which is exactly how home users should think about session planning. A 10-minute panel session at 6 inches may be a very different treatment from a 10-minute session at 14 inches, even if the same device is used for both.
Here is a simple example with a panel:
Setup |
Measured or Stated Irradiance at Skin |
Time |
Estimated Dose |
Face panel, centered, 6 in away |
80 mW/cm² |
10 min |
48 J/cm² |
Face panel, slightly farther or angled |
40 mW/cm² |
10 min |
24 J/cm² |
Face panel, same lower irradiance |
40 mW/cm² |
20 min |
48 J/cm² |
Those are example numbers, not universal targets, but they show the planning logic clearly: if irradiance drops, you either accept a lower dose or extend time.
Mats usually trade intensity precision for coverage convenience
A mat often makes large-area body routines easier because you do not need to stand still in front of a beam. That can be useful for back, glutes, hamstrings, or calves, where coverage and convenience drive compliance. The tradeoff is that you may know less about exact skin-level irradiance unless a company publishes realistic contact-use data or you measure it yourself.
For example, a lower-back mat session with direct contact may be very repeatable from day to day, which is a real advantage for recovery routines. But if you add a folded towel for comfort, or if the mat bridges over a curved area instead of lying flush, the dose can shift without you changing the timer.
Panels usually trade convenience for control
Panels are often better when you want to target a face routine, a knee, a shoulder, or a defined standing treatment zone with a known distance. They also make it easier to intentionally widen or narrow the treatment area. Moving farther away usually gives broader coverage, but intensity per point usually falls.
That means session planning becomes a tradeoff: more distance often improves coverage, less distance often improves intensity, and the best choice depends on whether your goal is a small, targeted area or a larger body region.
Device-Page Claims vs Measured Skin-Level Exposure

Product-page irradiance is not the same as your real session
Photobiomodulation guidance asks manufacturers to specify testing conditions and output variables, because an irradiance claim only means something when the distance, beam area, and method are defined. A panel listed at 100 mW/cm² may be reporting a center-point reading at a specific test distance under ideal alignment. Your cheek, shoulder, or outer thigh may receive less.
This is where users often overestimate dose. They read one high number on a product page, then assume that same number applies across the whole treatment area. In practice, edge falloff, body contour, angle, hair, fabric, and movement all change what the skin receives.
“Regulator registered” is not the same as approved or cleared
Consumer guidance from a regulator states that “regulator registered” and “regulator certified” do not mean a device is approved. For product selection, that matters because marketing language can sound more rigorous than it is.
If a brand highlights regulatory status, check what that status actually refers to. For a home wellness buyer, the practical question is not whether a phrase sounds official, but whether the device has credible output specifications, a clear intended use, and testing conditions that help you estimate what reaches the skin.
Mat vs Panel at a Glance

Parameter |
Red Light Therapy Mat |
Why It Matters |
|
How distance is measured |
From emitter to skin, often 0 in in contact use |
From panel face to skin surface in inches |
The reference point is different |
Output consistency |
More stable on flat contact areas |
Changes more with distance and beam position |
Repeatability depends on setup style |
Main source of dose error |
Fabric layers, gaps, body contour |
Beam spread, angle, edge falloff, body movement |
Errors happen for different reasons |
Best logging method |
Contact status plus body position |
Exact inches plus body position and beam centering |
Good notes reduce guesswork |
Coverage pattern |
Broad contact-area coverage |
Narrower or wider depending on distance |
Distance changes both area and intensity |
Best for |
Passive large-area routines |
Targeted face, joint, or standing body routines |
Match device type to routine goal |
FAQ
Q: Does treatment distance matter if a red light therapy mat is touching the body? A: Yes, but in a different way. If the mat is in direct contact, distance is effectively 0 inches at the points touching the skin. What matters then is whether the contact is uniform, whether you added fabric layers, and whether body curves create air gaps.
Q: How should I measure panel distance for face treatments versus larger body areas? A: Measure from the front of the panel to the skin surface you want to treat. For the face, measure to the cheek or forehead plane that actually receives the light. For larger body areas, measure to the closest treated surface and keep posture consistent so the same area stays centered in the beam.
Q: Why can two devices at the same distance feel completely different? A: Because distance is only one variable. LED density, beam angle, optics, hotspot pattern, wavelength mix, and testing method all affect irradiance. Two panels at 8 inches can deliver different skin-level exposure, and a contact mat can behave differently again because it is not relying on air-gap beam travel in the same way.
Practical Next Steps
Use this conservative checklist whenever you set up a home red light or near-infrared routine:
- Identify the true device type first: contact-style mat or non-contact panel.
- Record the real treatment distance: direct contact, one layer, or exact inches from panel face to skin.
- Keep posture repeatable so the same body surface receives the light each time.
- Treat product-page irradiance as a test-condition number, not an automatic skin-level number.
- Use the dose equation to compare setups when you know irradiance; if irradiance drops, time usually needs to increase to keep dose similar.
- For panels, recheck distance any time you change chair height, wall mount, or target body area.
- For mats, recheck contact conditions any time you add a towel, clothing layer, or change body position.
The safe rule is simple: measure the skin setup, not just the device placement. Once you separate contact use from non-contact use and log the actual treatment geometry, your red light therapy sessions become easier to repeat and much easier to compare.


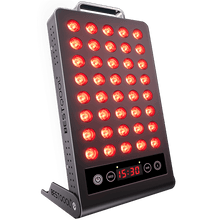
 Small
Small
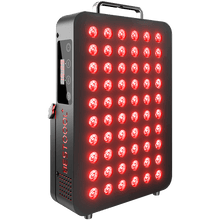
 Moderate
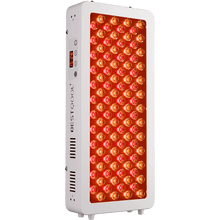
 Moderate

 Moderate
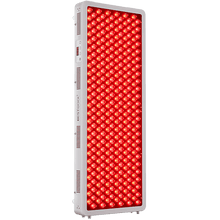
 Full
Full

