

For solo back sessions, a medium or tall panel is usually the point where treatment becomes realistic instead of frustrating. Small panels can still work, but they are best for one back zone at a time and usually require extra repositioning.
If you have ever tried to aim a panel at your own back and ended up twisting more than relaxing, the problem is usually coverage, not effort. The most workable setups let you treat a broad area from a stable position instead of chasing one exact spot. What follows is a practical way to choose panel size, distance, and setup so you can treat your back without needing another person.
Start With the Real Goal, Not the Marketing Label

Research on low-intensity laser and LED photobiomodulation for musculoskeletal pain supports the general idea that light-based therapy can be useful for comfort and recovery, but it does not say that every panel size is equally practical for the back. For home use, the first decision is simpler: are you trying to cover one tight area, one full back zone, or most of the back in one pass?
Reviews of nonspecific low back pain protocols also show why setup matters so much. Results in this category tend to depend on treatment parameters and consistency, not just on owning a device. That leads to a useful home-use rule: choose the panel by how many positions it takes to cover the area you actually want to reach by yourself.
Match the Panel to the Zone
For solo use, these are the zones that usually change the answer:
- Upper back: shoulder blades, traps, and the band across the bra line or upper thoracic area.
- Mid-back: the area around the lower shoulder blades and ribs.
- Lower back: the beltline and upper glute transition.
- Full back: roughly shoulders to waist, sometimes extending lower.
If your goal is only upper back or only lower back, a smaller panel may be enough. If your goal is “I want to stand there and treat most of my back without moving the device twice,” size becomes much more important.
The Panel Size That Usually Feels Practical

The photobiomodulation literature keeps emphasizing dose, wavelength, and delivery setup, not a magic consumer panel dimension. Because of that, the most useful shopping question is not “What is the strongest panel?” but “How much of my back can I cover from a stable position at the distance I will actually use?”
In practical home-shopping terms, these size ranges are the most useful breakpoints. They are not clinical cutoffs; they are a coverage-based buying shortcut for solo back treatment.
A Practical Size Guide
Solo goal |
Typical panel size that feels workable |
Repositioning likely |
Best fit for solo use |
One small back zone |
About 6-8 in wide and 12-18 in tall |
2-4 positions |
Upper traps, one shoulder blade area, one side of lower back |
One full back band |
About 10-12 in wide and 24-36 in tall |
1-2 positions per zone |
Upper back or lower back without constant adjustment |
Most of the back |
About 12-18 in wide and 36-48+ in tall |
1-2 positions total |
Best chance of treating the back alone with minimal help |
For most people, the real tipping point is not width alone but vertical height. A taller panel usually does more for solo back sessions than a slightly wider one, because the back is a long treatment area from shoulders down to the waistline. If you want “no help needed” treatment, a medium panel is often the smallest category that feels manageable, while a tall panel is the category that starts to feel genuinely easy.
Positioning Matters as Much as Size

Evidence on photobiomodulation mechanisms and treatment delivery makes one point especially relevant for home users: how the light reaches the target area matters. That is why a door mount, floor stand, or other fixed setup is often just as important as panel size when you are treating your own back. A great panel becomes annoying fast if you have to hold it behind you or keep turning your torso to stay in range.
For comfort-focused home use, center the panel on the broader muscle area around the spot that feels tight or tender rather than trying to chase one exact point. On the back, that usually means aiming at the paraspinal band, shoulder-blade region, or lower-back band, not one fingertip-sized target. This is especially helpful when you are using a panel alone and need the routine to stay simple.
Solo Setups That Actually Work
A mounted setup is usually the most workable option. Standing in front of a door-mounted panel or backing up to a floor-stand panel keeps your distance steadier and frees you from twisting. For upper back use, the middle of the panel should generally line up between the shoulder blades. For lower back use, the center should usually sit closer to beltline height.
A chair can also help. Sitting on a low stool or straight-backed chair often makes it easier to keep the mid-back or lower back in the beam without fidgeting. If you notice that you have to lean, shrug, or rotate to “find the light,” the setup is still too awkward for repeat use.
Distance and Session Length Change the Answer
Home use gets easier when you remember that distance changes both coverage and irradiance. Moving the panel farther away can spread the light over a larger patch of your back, which helps with coverage, but it also reduces how much light reaches the area. That is why distance can fine-tune a good setup, but it rarely rescues a panel that is simply too small for your goal.
A practical solo session is one you can repeat without dreading the setup. If your upper back needs one position and your lower back needs another, a session that looks short on paper can become long in real life. For example, two 12-minute positions plus setup time can push the routine toward half an hour. That is often where consistency starts to drop, especially if you are using the panel several times per week.
Use Distance to Fine-Tune, Not to Rescue a Tiny Panel
A small panel can be made to “cover more” by stepping back, but that tradeoff is not always worth it. In most cases, it is better to choose a panel that covers the zone at a comfortable working distance than to buy too small and compensate forever with extra distance and extra time.
The safest practical approach is conservative: follow the device instructions, start with the shorter end of the suggested session range, and only increase if the area feels comfortable afterward. If you are treating more than one zone, shorter repeatable sessions are usually better than one overly long session that makes the routine hard to maintain.
Comfort Checks Should Control the Routine

Research comparing lasers and LEDs in photobiomodulation reinforces that treatment response depends on parameters, not just device category. In home use, that means comfort should outrank habit. If the skin feels unusually hot, dry, itchy, or more reactive than usual, shorten the session, increase the distance, or skip that day rather than forcing the routine.
The same conservative thinking applies to skin and hair. Bare, clean, dry skin gives more predictable exposure than fabric, heavy lotion, or sweat. Dense back hair can slightly reduce direct exposure, but it is not a reason to overcorrect with much longer sessions. It is a reason to keep placement consistent and expectations realistic.
What to Watch Before and After a Session
Use quick comfort checks before and after each session:
- Check that the panel can stay stable without being held by hand.
- Check that the target area is exposed and not rubbing against clothing.
- Check for unusual warmth, lingering redness, dryness, or irritation afterward.
- Check whether the routine still feels easy enough to repeat several times per week.
If the area becomes more reactive instead of more comfortable, the right move is usually less time, more distance, or a pause, not automatically more intensity.
Common Mistakes That Make Solo Back Treatment Harder
Clinical studies on high-intensity laser therapy for low back pain are not a direct blueprint for home LED panels. Consumer red light and near-infrared panels are different tools, used differently, and they should be judged by practical home coverage rather than by borrowing assumptions from clinic-based laser protocols.
The most common shopping mistake is buying for headline power or “full body” marketing instead of actual back coverage at your working distance. The most common usage mistake is assuming that closer is always better. Sometimes closer is better for intensity, but if the beam no longer covers the target area without awkward movement, the session becomes less useful.
Mistakes That Waste Time
- Choosing a very small panel for full-back goals.
- Holding a panel behind you instead of mounting it.
- Aiming only at the sharpest point instead of the broader back zone around it.
- Letting a two-position session turn into a four-position routine.
- Increasing session length even when the skin or tissue feels more reactive.
When a routine becomes too complicated to repeat, that is usually a sign the panel is too small for the job or the setup is wrong. And if symptoms are severe, spreading, or not improving, that is a reason to get medical guidance rather than keep experimenting with panel geometry.
FAQ
Q: Can a small panel still work if I live alone? A: Yes, if your goal is one limited area such as the upper traps or one side of the lower back. Smaller panels can still support a home routine, but for solo back use they usually mean more repositioning and more total session time.
Q: Is a taller panel better than a wider panel for the back? A: Usually yes. The back is a long vertical target, so extra height often reduces repositioning more than a small increase in width. If your goal is shoulders-to-waist coverage, taller panels are usually the more practical upgrade.
Q: Does near-infrared matter for back sessions? A: In many home wellness devices, red and near-infrared are paired for broader body-area use, and the photobiomodulation literature supports the idea that treatment parameters matter more than color labels alone. For back routines, the bigger issue is still whether the panel can cover the area comfortably from a stable position.
Practical Next Steps
A good solo back panel is not the biggest one you can buy; it is the smallest one that lets you treat the target area from a stable mounted position without turning the session into a chore. For one back zone, a small or medium panel may be enough. For upper-and-lower back use, or for treating most of the back in one session, a medium-to-tall panel is usually the point where independence becomes realistic.
Action Checklist
- Define your target first: upper back, lower back, or most of the back.
- Count how many positions the panel would need at your likely distance.
- Prefer a mounted setup over hand-holding whenever possible.
- Choose vertical coverage before chasing raw power claims.
- Keep sessions short enough that you can repeat them consistently.
- Reduce time or increase distance if the skin feels unusually warm or reactive.
- If the routine keeps getting longer and more awkward, move up in panel size.
If you want the simplest answer, this is it: a small panel can treat part of your back, but a medium or tall panel is what usually lets you treat your back by yourself in a way you will actually keep doing.


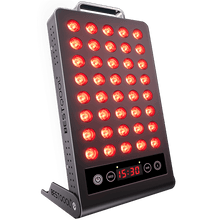
 Small
Small

 Moderate

 Moderate

 Moderate

 Full
Full

