
The main constraint in a small room is usually the usable treatment zone, not where devices fit when they are switched off. Start by mapping where a person will stand, sit, or lie down. Then account for each device's operating distance, support or mounting method, ventilation instructions, power rating, cord route, and glare or eye-protection directions.
Portable formats can reduce the amount of permanently occupied space. Wraps and belts can be used on a couch or bed without a dedicated installation, while smaller handheld and tabletop devices may fit into an existing room with limited rearranging. A multi-panel arrangement, by contrast, needs a deliberate plan for movement, mounting, ventilation, and electrical load.
Start with the Treatment Position, Not the Device Count

A room can store several devices yet still be impractical for using them together. The first question is not "Where can the panels go?" It is "Where can the user safely and comfortably be during a session?"
Draw a simple floor plan that includes:
- Room walls, windows, and fixed furniture
- Door swing and the path to the exit
- Wall outlets and any known shared loads on those circuits
- The intended standing, seated, or lying-down position
- Device outlines, stands, tabletops, mounts, and cord paths
Place the person's treatment position on the plan before adding devices. This helps reveal whether an open-light device would block a doorway, require furniture to be moved for every session, or leave too little room to step into and out of the treatment area.
Different session positions create different conflicts:
- Standing use can compete with floor-standing panels, tower supports, lamps, and nearby furniture.
- Seated use needs space for the chair as well as the device's specified operating position.
- Lying-down use makes the bed, couch, or floor area the treatment zone, which may limit where open-light devices can stand or mount.
- Targeted use can often work in a smaller space, but still requires a stable device position, accessible controls, and safe cord routing.
If the room cannot support the intended body position with doors and exits unobstructed, adding another device is unlikely to solve the problem. Alternating devices or sessions may be more workable than trying to operate everything at once.
Compare Formats by Their in-Use and Storage Footprints
Device formats differ less by how much shelf space they occupy than by how much room they claim during use.
| Device Format | Main Space Consideration During Use | Storage or Installation Consideration | Common Small-Room Constraint |
|---|---|---|---|
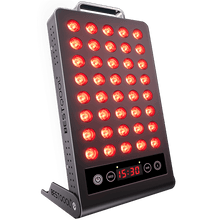
| Freestanding panel | Needs a stable support location and a clear user position in front of it | Stand remains on the floor unless moved | Competes with walkways and standing space |
| Wall-mounted panel | Uses wall area while preserving more floor space | Requires a permitted mounting location | Wall position may not align with the desired user position |
| Tabletop unit | Needs a stable surface and a nearby treatment position | Can often be put away between sessions | Surface height and available table space may limit placement |
| Lamp-style device | Requires a stable base or permitted support arrangement | May need storage when not in use | Base, arm, and cord can intrude into a narrow room |
| Mask | Worn on the face rather than positioned across the room | Requires accessible storage and charging or power access, depending on the model | May be simple to store but can add glare-management considerations when used near open-light devices |
| Wrap or belt | Used directly on a targeted area | No permanent room installation is necessarily required | Requires a comfortable seated or lying position rather than open floor space |
| Handheld device | Used close to a targeted area according to its instructions | Usually has a relatively small storage burden | Requires the user to hold or position it for the session |
A format planning guide describes wraps and belts as portable options that can be used on a couch or bed, while smaller handheld and tabletop devices may be integrated with little rearranging. That does not make these formats interchangeable with larger panels or lamps. It simply changes where the space demand occurs.
For example, a wrap may need little permanent floor area, but it still needs a usable chair, couch, or bed position. A wall-mounted panel may free the floor below it, but it can create a fixed treatment zone that must remain clear. A tabletop device may be easy to store, yet its required operating position can still conflict with a desk, vanity, or bedside table.
Separate Storage Space From Active-Use Space
A useful small-room plan has two maps:
- Storage map: Where each device sits when it is not in use.
- Operating map: Where the device, user, cords, and any support equipment must be during a session.
Do not assume that a device is "small-room friendly" simply because it can be stored in a closet. A larger panel on a rolling stand may be easy to move out of sight but still occupy the only clear standing area when active. Conversely, a wrap or handheld device may be stored in a drawer but require no additional open-light position in the room.
For each device, identify:
- Where it rests between sessions
- Where it operates
- Whether it must be moved before use
- Whether the user can enter and leave the treatment position without stepping over cords
- Whether another active device would obstruct its intended position
This distinction becomes especially important when combining a full-body or partial-body panel with a targeted device. The room may accommodate both, but not necessarily at the same time.
Lay Out Multiple Devices with an Intentional Coverage Plan
When two or more open-light devices face the same treatment area, avoid placing them based only on available wall or floor space. Instead, use each device's manual to mark its stated operating distance and intended orientation on the room plan.
The usable zone is the area where the person can fit while meeting the instructions for every active device. If that zone is too narrow, too close to a door, or difficult to enter safely, the layout is not practical even if the devices physically fit.
Choose One of Three Layout Approaches
Intentional overlap: Two devices may be aimed toward the same general body position only when their instructions, treatment distances, eye-safety directions, ventilation needs, and electrical requirements are all compatible. Do not assume that placing devices closer together creates a predictable exposure pattern or that overlapping light is automatically desirable.
Separated treatment areas: A room may support one device at a standing location and another at a seated or lying-down location. This can reduce crowding, but only if both positions preserve access, cord safety, and the required operating conditions.
Alternating sessions: If devices compete for the same physical space, outlet, or user position, sequential use may be the clearer option. Alternating sessions can avoid a congested treatment zone without requiring you to make assumptions about simultaneous operation.
For face-focused use near an open panel, review the panel's guidance on how close to position your face rather than borrowing distance guidance from another device format.
Verify Mounting, Ventilation, Heat, and Glare Requirements Model by Model
The room plan should never replace the device manual. Mounting, clearance, operating orientation, ventilation space, surface restrictions, temperature-related cautions, and eye-protection directions are model-specific.
Before committing to a location, verify:
- Whether the device may be wall-mounted, ceiling-mounted, placed on a tabletop, or used only with its supplied stand
- Whether the selected wall, furniture surface, or support system is permitted by the manufacturer
- The manual's ventilation and clearance requirements
- Whether the intended operating orientation is allowed
- Whether the device has cautions about nearby fabrics, soft furniture, or enclosed spaces
- The manufacturer's instructions for glare management and eye protection
Multi-panel systems can increase the demands on a room's electrical and ventilation setup. Treat those requirements as part of the layout, not as details to solve after mounting equipment.
Glare is also a layout issue. Two open-light devices can make it harder to find a comfortable position, reach controls, or avoid looking toward active light sources. Plan where the user will face, how devices will be switched on and off, and what the manual says about eye protection. For full-body sessions, review the device-specific question of whether eyes should be open or closed alongside the manufacturer's instructions.
Plan Power and Cables Before Running Multiple Devices at Once
A small room may have limited outlets, but multiple plugs do not automatically mean multiple devices can run together. Check each device's nameplate and manual before deciding on simultaneous use.
A device's rated or running current is its maximum current for continuous operation; the rating is typically shown on its nameplate. University electrical-safety guidance notes that continuous draw beyond an equipment rating can contribute to component failure.
Use a conservative pre-use check:
- Record the nameplate wattage or amperage for every device you plan to run.
- Identify what else is on the same circuit, including nearby appliances and electronics.
- Follow each manufacturer's instructions for direct outlet use, power strips, timers, smart plugs, and extension cords.
- Do not assume a surge suppressor is suitable as a power tap just because it has multiple outlets.
- Keep plugs, controls, and disconnect points accessible.
- Route cords so they do not cross the doorway, treatment entry path, or the area where the user stands up from a chair or bed.
- Do not run cords through doors, walls, or windows, and do not connect extension cords in series.
Institutional fire-prevention guidance treats extension cords as temporary rather than permanent wiring and prohibits routing them through doors, walls, or windows; see the UC Davis electrical-safety guidance. That guidance is workplace-specific, not a substitute for residential code or a device manual. Still, it reinforces a practical point: a crowded room should not depend on improvised cable routing.
If the outlet arrangement, circuit load, or approved accessory requirements are unclear, do not treat simultaneous operation as established. Use devices separately until the setup can be verified under the applicable instructions and local requirements.
Small-Room Readiness Checklist
Before using multiple red light devices in a small room, confirm that:
- [ ] Room dimensions, fixed furniture, and door swing are mapped.
- [ ] The standing, seated, lying-down, or targeted treatment position is clear.
- [ ] Each device's manual has been reviewed for distance, mounting, orientation, ventilation, heat, and eye-safety instructions.
- [ ] Stands, wall mounts, tables, and storage locations are stable and permitted.
- [ ] Nameplate ratings and other loads on the circuit have been checked.
- [ ] Cords do not block exits, doorways, or movement paths.
- [ ] Glare and eye-protection directions are addressed for every active open-light device.
- [ ] Beam overlap is intentional---or the plan uses separate positions or alternating sessions instead.
For model-specific setup details, use the official manual for every device in the room and review electrical outlet requirements for multiple red light devices before treating a multi-device layout as ready for simultaneous use.


 Small
Small

 Moderate

 Moderate

 Moderate

 Full
Full

