
Sciatica has a way of hijacking your day. Sitting feels risky, standing feels tense, and sleep stops being restorative. In many cases, the pain comes from irritation around a lower-back nerve root that feeds into the sciatic nerve pathway, so the discomfort shows up far from the original source. When people explore red light therapy, they are usually looking for a drug-free option that supports recovery at home, without turning life into an endless cycle of flare-ups and “good days only.”

Why Does Your Sciatica Hurt?
Sciatica pain usually comes from a nerve root in the lower spine that gets irritated, compressed, or both. That nerve sensitivity can send sharp, burning, or electric sensations through the buttocks and down the leg. Some people also notice tingling, numbness, or weakness, which is a clue that the nerve is involved rather than just muscle soreness.
What Is Actually Triggering the Pain
- A bulging or herniated disk that crowds the nerve space
- Local inflammation that keeps the nerve reactive
Protective muscle guarding in the low back, glutes, and hips that increases stiffness
When to Get Checked Urgently
If you notice new bowel or bladder dysfunction, saddle numbness, or rapidly worsening leg weakness, treat that as urgent. Those signs deserve immediate medical evaluation.
Can Red Light Therapy Relieve Sciatica Pain?
Yes. Research in photobiomodulation and low-level light interventions suggests benefits for some forms of back-related nerve pain, especially when light is used consistently and paired with movement-based care. Results vary because the cause of sciatica varies.
What Improvement Often Looks Like
With red light therapy, the changes people tend to notice first are reduced burning-type irritation, smoother sit-to-stand movement, less low-back and glute tightness, and better tolerance for walking or rehab work. It supports comfort while symptoms settle, similar to heat or manual therapy.
How It May Work in the Body
Photobiomodulation is commonly discussed in terms of cellular energy and signaling. In simplified terms, red and near-infrared light can influence how cells handle oxidative stress and inflammation while supporting local circulation. Those effects are often described as helpful when tissue is stuck in a reactive, slow-to-settle state.
Which Light Specs Matter for Deep Nerve Pain?
Sciatica is deep, so “nice-looking light” is not the same thing as useful dosing. The specs that matter are the ones that change how much energy reaches the lower back and glute region in a predictable way.
Wavelength Choice for Deeper Targets
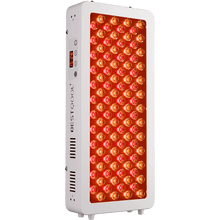
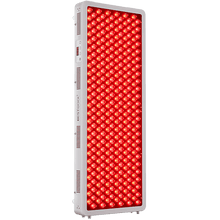
Near-infrared wavelengths are commonly chosen for deeper tissue targets because penetration is generally better than many visible wavelengths. For sciatica, people often look for near-infrared options around the 800–900 nm range, including popular mentions of 850 nm. You do not need to obsess over a single number, but you do want near-infrared capability if the goal is deep discomfort rather than surface skin concerns.
Intensity and Distance Decide the Delivered Dose
Intensity at the body changes dramatically with distance. If you stand far away, the dose can drop enough that sessions feel like a waste of time. That is one reason red light therapy panels used at close range often feel more purposeful for deep pain compared with diffuse exposure.
- If you cannot keep the same distance each session, results tend to feel inconsistent.
- If sessions feel uncomfortably hot, the dose may be too aggressive for your skin tolerance.
Finding the Right Dose
Photobiomodulation is frequently described as dose-sensitive. Too little can feel like nothing happened. Too much can irritate tissues or create a “wired” feeling. Comfort and repeatability are strong guardrails for finding your personal zone.

Why Do Gym Red Light Booths Often Miss the Mark for Sciatica?
Booths are built for general wellness experiences, and that design has trade-offs. For sciatica, the problem is rarely motivation. It is the delivery.
The Energy Gets Spread Too Thin
Sciatica often calls for focused dosing at the lower back and the painful side glute. In a booth, energy is distributed across a large area, so the deepest target may receive less concentrated exposure than you expect. That is a common reason people walk out thinking red light therapy “didn’t work,” even though they simply did not deliver enough usable dose to the right zone.
Positioning Is Hard to Repeat
Small differences in stance and distance can change what reaches your body. During a flare, standing still can also feel miserable, which makes sessions harder to tolerate and harder to repeat.
Convenience Does Not Equal Consistency
Sciatica often behaves like a daily management issue. A booth session once in a while can feel pleasant, yet it rarely supports the steady routine that deep nerve irritation tends to respond to.
How to Structure an At-Home Routine for Sciatica
A home routine works when it is simple enough to repeat and specific enough to matter. Keep the steps limited. Keep the setup comfortable. Track response over two weeks, then adjust.
Step 1: Choose Two Core Treatment Zones
Most people do best with two targets:
- The lower back on the painful side, around the L4 to S1 area
- The painful side glute region, where piriformis and deep hip tension often overlap with sciatic symptoms
If symptoms travel down the hamstring or calf, add a brief pass along the pain pathway on the tougher days.
Step 2: Set a Repeatable Position and Distance
Pick a position that lets your hip relax. Lying on your side with a pillow between the knees or lying on your stomach with light support under the hips can work well, depending on comfort. Keep the device close enough that the session feels meaningful, while staying within skin comfort. Eye protection is a good habit.
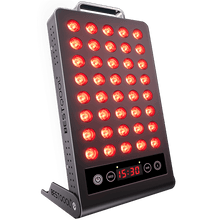
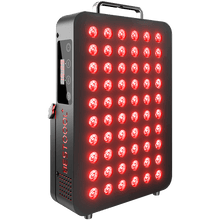
This is also where a targeted panel can be useful. A device like Bestqool’s Pro200 can fit naturally into a home setup because you can control placement and proximity without standing through discomfort.
Step 3: Keep Session Length Simple
A practical template for many people looks like:
- 10 to 15 minutes on the lower back zone
- 10 to 15 minutes on the glute zone
If you are sensitive, reduce the time and build gradually. With red light therapy, consistency tends to beat aggressive single sessions.
Step 4: Pair Light with One Gentle Decompression Habit
Right after the session, pick one option that feels calming:
- A short walk
- Gentle hip mobility work
- Easy nerve glides that stay below a pain spike
If symptoms jump sharply, reduce the range of motion and intensity. Pain that lingers longer than a few hours is feedback to scale back.
Safety Notes
Use caution if you take photosensitizing medications, have active skin conditions in the treatment area, or have a history that warrants medical guidance. If you are pregnant or managing a complex medical condition, check with a clinician before committing to a routine.
Build a Consistent Routine to Restore Mobility
A routine works when it respects your real schedule and your nervous system’s need for stability. Aim for a rhythm you can keep through busy weeks, then let results accumulate instead of chasing instant change. Combine light sessions with daily movement that feels safe, because prolonged inactivity can keep the lower back and hips stiff and reactive. Over time, steadier symptoms often make rehab exercises easier to tolerate, which is where long-term improvement usually comes from.
FAQs
Q1: Is Photobiomodulation the Same as an Infrared Sauna or Heat Lamp?
No. Photobiomodulation uses red and near-infrared light in non-thermal doses to influence cellular signaling. Infrared saunas and many heat lamps are designed primarily to raise tissue temperature for relaxation or sweating. Heat can feel good, yet it is a different tool. If your goal is nerve-type pain support, choose a device intended for photobiomodulation, not a heating appliance.
Q2: Does Light Therapy Work Through Clothing?
Bare skin works best. Fabric can absorb, reflect, or scatter light, which lowers the dose that reaches your target area. clinical protocols typically apply light directly to the skin for consistent delivery. If privacy matters, thin, light-colored fabrics may allow some transmission, yet results can become less predictable. For sciatica zones like the low back and glutes, exposed skin is the practical choice.
Q3: How Long Should You Use It Before Deciding It Is Worth It?
Plan on a few weeks, not a few sessions. Many clinical routines for back-related nerve pain use frequent treatments across roughly 3 weeks, and some people need longer to notice functional changes. Track two things: pain intensity and a daily task like sitting tolerance or walking time. If nothing shifts after 3 to 4 consistent weeks, adjust dose, placement, or consult a clinician.
Q4: Can You Use Photobiomodulation if You Have Cancer or a History of Cancer?
It depends. Avoid applying light directly over a known or suspected tumor site unless your oncology team approves. Photobiomodulation is used in supportive cancer care in certain contexts, yet tumor-site exposure remains a cautious area in the literature. For a past cancer history, discuss location and goals with a clinician, especially if treatment would be near prior tumor fields.
Q5: Will It Help if Your Sciatica Comes From Spinal Stenosis?
It can help symptom control for some people, but it will not change the underlying narrowing. Stenosis is a structural constraint, so expectations should focus on comfort, irritation control, and improved tolerance for movement and rehab. If walking distance is limited or leg weakness is progressing, medical evaluation matters, since stenosis management can require targeted physical therapy or other interventions.


 Small
Small
 Moderate
 Moderate

 Moderate
 Full
Full


